Review of "Pop Bottle Science" from SKS Science
Think Outside of the Box and Inside the Bottle
By Debra Ross
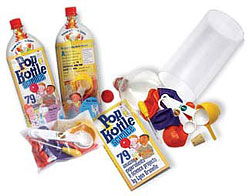
As a homeschooling mom, I usually use Winter Break Week as a break in the typical educational rhythm, in favor of more out-of-the-box learning opportunities. This one is out of the BOTTLE! We've been having fun with a nifty (and inexpensive!) kit from SKS Science, an upstate New York online supplier of educational science books and kits. It's called Pop Bottle Science. (Click on that link to get to their listing and full description.)
For only $11.27 (as of Feb 2009, plus shipping), you get a miniature science lab with 79 experiments that lets kids explore chemistry, physics, biology, geology, weather, the human body, and even (apparently, though I haven't investigated this one yet) astronomy. What I like best about this is that my 9- and 7-year-old were able, working together, to do more than one of these experiments *absolutely on their own*. While I am happy to be involved, the girls love the ability to learn on their own, and Pop Bottle Science gives the best of both worlds. Moreover, it's neat -- everything stores back up in the bottle, and it has a small footprint on the shelf. You can open up to any random page, and do an easy experiment that teaches the principles of (mostly) physics. In my opinion, it's best for kids about age 5 (with assistance) through about age 13.
Each experiment contains sections that explain "What you need," "what to do," and "what it means." When you need a grown-up, it tells you clearly, which I appreciate.
Here is a sample experiment, from page 57:
- What you need:
Sink or bowl
Ice and cold water
Hot tap water
Plastic pop bottle with cap
What to do:
1) Fill a bowl (one that's large enough for the pop bottle to fit inside) with ice and cold water.
2) Run the tap water until it gets hot, and fill up your bottle. Let the bottle sit for about one minute so that the bottle heats up.
3) Dump out the hot water and put the cap on immediately. You want to trap as much of the hot air (especially the steamy water vapor) as possible.
4) Put the bottle in the ice bath and hold it under the water. (If the cold water bothers your hands, use tongs.)
5) Wait a few seconds and see what happens to the bottle.
What is going on:
Hot air creates a lot of air pressure. But as water vapor condenses, and turns from air back into liquid, the pressure decreases. In this experiment, you made the pressure inside the bottle decrease very rapidly when you plunged the bottle into cold water. Colder air outside the bottle pushed against it and gave it a crunch.
If you watch weather reports, you'll notice that high and low pressure areas are a big part of the report. Generally speaking, high pressure means good weather. Low pressure can mean rain. And when the two types of pressure collide, there could be some rough weather.
People in the eastern United States particularly experience this in the form of storms called nor'easters, when low pressure systems traveling up from Florida hit high pressure systems traveling down from the Arctic.
(Experiment ©2004, Lynn Brunelle)
Review ©2009, Debra Ross